

Nalbinding Videos
Every nalbinder seems to have his/her own ways of working, and there is not only one 'right' way to do things, so also these videos are only guiding.
Note, e.g. "Finnish Stitch 1+2" means, when you are using thumb loops, that 1 loop stays around thumb, and 2 loops are picked up onto the needle. When you are working withouth thumb loops (flat), that means that the needle goes "under one, over two", ie the needle goes under-over-over - direction of the needle changes - under-under-over-(over).
Note, e.g. "Finnish Stitch 1+2" means, when you are using thumb loops, that 1 loop stays around thumb, and 2 loops are picked up onto the needle. When you are working withouth thumb loops (flat), that means that the needle goes "under one, over two", ie the needle goes under-over-over - direction of the needle changes - under-under-over-(over).
These LONGER VIDEOS include:
How to start (how to make the first loops), how to join a chain of stitches to a circle (joining a foundation row to a circle), how to start the second row (F1, F2, etc), how to tension stitches onto the needle (make stitch size smaller), how to make a round start. Voiceover both in English and Finnish.
Finnish Stitch 1+1 (Oslo Stitch) (video) 13:53 min
Finnish Stitch 1+2 (Mammen Stitch) (video) 15:32 min
Finnish Stitch 1+3 (Brodén Stitch) (video) 14:29 min
Finnish Stitch 2+2 ("Finnish Stitch"), and Finnish Stitch 2+3 (video) 16:47 min
York Stitch (Coppergate Stitch; Jorvik Stitch) (video) 15:11 min
Cross-knit looping (Coptic Stitch / Tarim Stitch) (video) 18:34 min
How to start nalbinding, how to make the FIRST LOOPS
1 - "scarf fringe knot", Vajanto's way (video)
2 - yarn 3 x around thumb, needle from left and right (video)
3 - a way often shown in Finnish magazines and books (flat) (video)
4 - knot, yarn 1 x around thumb (video)
5 - knot, twist needle around the loop behind thumb (Savitaipale) (video)
6 - loop, yarn 3 x around thumb (video)
7 - yarn 3 x around fingers, an "8" onto needle (video) (video)
8 - wrap yarn as an "8" around thumb and forefinger (video)
9 - loop, split yarn with the needle (video)
10 - yarn 3 x around thumb, needle from left (Joutseno) (video)
11 - Flat Coil, then either go "under, over", or "between the plies" (video)
How to join a chain of stitches (foundation row) to a CIRCLE
Finnish Stitch 1+1 (Oslo Stitch), short video (video)
Finnish Stitch 2+2, long video (video)
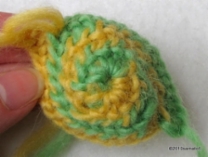
Round start, two-coloured (video B)
SECOND ROW (F1, F2, etc)
How to connect new stitches to the previous row:
From Front to back (F1, F2), from Back (B1, B2) (video)
From Front to back (F), from the Middle (M1, M2) (video)
To the reverse side (video)
How to make a ROUND START
The first stitches into the large starting loop can be made in the way you prefer, and when you have made enough of the stitches, and pulled the large starting loop tight, to a rosette, you can continue with whatever stitch you prefer (ie you don't have to use the stitches shown on the videos).
How to increase stitches when making a round start,
that's explained on "Video H" (video)
A - First stitches with Danish Stitch, then Finnish Stitch 2+2 (video)
C - create/cast on the stitches like when knitting, then Finnish Stith 1+1 (Oslo Stitch) (video)
D - Finnish Stitch 1+2 (Mammen Stitch) (video)
E - Crochet a circle, then Finnish Stitch 1+1 (Oslo Stitch) (video)
H - First stitches with York Stitch, then Finnish Stitch 2+2 (Aili Kuronen's way) (video)
B - Two-coloured, first with Danish Stitch, then Finnish Stitch 1+1 (Oslo Stitch) (video)
F - Two-coloured, Finnish Stitch 1+1 (Oslo Stitch), how to add second colour (video)
G - Two-colored, Finnish Stitch 2+2, how to add second colour (video)
- Finnish Stitch 2+2, longer video (video)
- Åsle Stitch (video)
Another way to make a ROUND TOP to mitten, is to make a short chain of stitches (2-3 cm), then pivot like when doing a square top mitten. In this case, though, the increases are done like when doing a round top mitten.
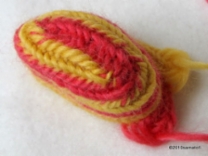
Square top, two-coloured (video C)
How to make a SQUARE TOP (pivot)
A - How to pivot (turn at the corners) is shown in three different stitches:
Finnish Stitch 2+2, Russian Stitch 2+2+2, and
Finnish Stich 1+2 (Mammen Stitch) (video)
B - Crochet the first row (a foundation row), continue with nalbinding, Finnish Stitch 1+1 (Oslo Stitch) (video)
You can, of course, use any stitch instead of the one shown on the video.
D - Finnish Stitch 2+2, a longer video (video)
C - Two-coloured, Finnish Stitch 2+2 (video)
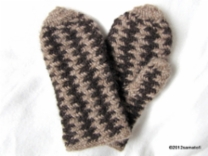
Two-coloured mittens, with vertical stripes (Aili's way) Finnish Stitch 1+2 (Mammen Stitch)
How to make SPOTS, How to make VERTICAL STRIPES
Finnish Stitch 2+2, short (Aili Kuronen's way) (video)
Finnish Stitch 2+2, longer (Aili Kuronen's way) (video)
The colour change technique shown by Aili Kuronen suits also for example Russian Stitch. The 'waiting' colour is picked up in a similar way as on the videos.
Note, that when using Russian Stitch, the shape of the spots will be different when you use thumb loops, compared to the shape when working without thumb loops (flat).
In addition, when working without thumb loops (flat), the shape of the spots will be different when you insert the needle through all the loops, and then pull the needle and yarn through, compared to the shape when you first insert the needle 'half-way' (under-over-under), pull the needle and yarn through, and then finish the stitch by inserting the needle over-under-over, and then again pull the needle and yarn through.
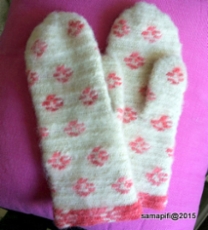
Two-coloured mittens, with vertical stripes (Aili's way) Finnish Stitch 1+2 (Mammen Stitch)
Ring shaped SPOTS / decorations (video)
Russian Stitch 2+2+2 (UUOOUU/OOUUOOO)
Two ways: with thumb loops, and flat
How to SPLICE, adding a new piece of yarn
By plaiting/braiding (by Aili Kuronen) (video)
By ply-splitting (by Aili Kuronen) (video)
How to change the yarn (or colour) on the reverse (by Aili Kuronen) (video)
How to change the yarn (or colour) on the reverse, 2:30 min onwards (video)
How to INCREASE, How to DECREASE (video)
Decreasing (video)
Increasing, a square top mitten, long video (video)
Increasing, a round top mitten, long video (video)
How to work TO AND FRO / A FLAT PIECE (re like a square pot holder)
Finnish Stitch 1+1 (Oslo Stitch) (video)
Depending on the stitch, make 1-3 additional stitches at the end of each row before turning the work. You can either make the additional stitches into the last loop of the previous row, or make 'air stitches', ie don't connect them to the previous row (just like when doing the very first row of stitches).
To make loopy fringes for a scarf, you can make at the end of each row a longer chain of stitches ('air stitches') before turning the work.
How to finger crochet a long piece of yarn (Haahlaaminen) (video)
How to fold a long piece of yarn into several folds (video)
How to TENSION STITCHES ONTO NEEDLE, make smaller stitches, gauge (video)
When
working with stitch types which don't involve several stitches, for
instance Finnish Stitch 1+1 (Oslo Stitch), Finnish Stitch 1+2 (Mammen
Stitch), and Russian Stitch 1+1+1 (Dalby Stitch), it may be necessary to
pull the new stitches smaller, especially if the yarn is thin, in order
to get the structure look like the way you want. Pulling the stitches
smaller, or tensioning them onto the needle, gives you smaller gauge and
denser structure.
Different Nalbinding Stitches
Outside
Finland, many of the stitches are known by the name of the place of a
historical find, or by the name of a village or area. Such names are
included in the parenthesis.
FINNISH STITCH GROUP
Finnish Stitch 1+1 (Oslo Stitch; Lund; Södertjära; Simtuna) (video) (video) (video)
Finnish Stitch 1+1, plaited edge (Björsbo) (video)
Finnish Stitch 1+1, plaited edge, F1B1 (my experiment) (video)
Finnish Stitch 1+1,5 (1+1½) (Valö) (video)
Finnish Stitch 1+2 (Mammen Stitch; Korgen Stitch; Börstil I; Uppsala) (video) (video; long)
Finnish Stitch 1+2 B2 (video)
Finnish Stitch 1+2, plaited edge (Rindal) (video)
Finnish Stitch 1+2 M1, Kaukolan Kekomäki (video)
Finnish Stitch 1+2 M2 from left to right (Müsen) (video)
Finnish Stitch 1+2 M2 from right to left (my experiment) (video)
Finnish Stitch 1+2 M1+F1 (Variant G) (video)
Finnish Stitch 1+2,5 (1+2½) (Pyhäjoki; Morkarla) (video)
Finnish Stitch 1+2,5 (1+2½), plaited edge (Stutby) (video)
Finnish Stitch 1+3 (Brodén Stitch; Norrtälje; Nysätra; Uppsala) (video) (video; long)
Finnish Stitch 1+3 M1 (Brottby Stitch; Brottbytekniken) (video)
Finnish Stitch 1+3, plaited edge (Alsike) (video)
Finnish Stitch 1+3, variant (Rådmansö) (video)
Finnish Stitch 1+3 F2 (from left to right) (video)
Finnish Stitch 1+3,5 (1+3½) (Sorunda 2) (video)
Finnish Stitch 1+4 (Långaryd) (video)
Finnish Stitch 1+5 (Bålsta) (video)
Finnish Stitch 2+1 (Fåberg) (video)
Finnish Stitch 2+1, plaited edge, F1 (Räisälä) (video)
Finnish Stitch 2+2 (video)
Finnish Stitch 2+2 (Aili Kuronen's way) (Rautjärvi) (video)
Finnish Stitch 2+2, Aili's way shown by me, slower (video)
- When working in Aili's way, the stitches can be pulled smaller.
Finnish Stitch 2+2, plaited edge, F1 (video)
Finnish Stitch 2+2, plaited edge, F2 ("under X") (Parikkala style) (video)
Finnish Stitch 2+2,5 (2+2½) (Kuolemajärvi) (video)
Finnish Stitch 2+3 (video)
Finnish Stitch 2+3 "drop & pick" (Joutseno) (video)
Finnish Stitch 2+3 "drop & pick" (video)
Finnish Stitch 2+3 mirror image, plaited edge (Metsäpirtti 1) (video)
Finnish Stitch 2+3,5 (2+3½) (Kaustinen) (video)
Finnish Stitch 2+4 (Östra Göinge) (video)
Finnish Stitch 2+5 (Ruskeala) (video)
Finnish Stitch 3+1
Finnish Stitch 3+1, variant (Nemi's Back Weave)
Finnish Stitch 3+2 "drop & pick" (Salsta) (video)
Finnish Stitch 3+3 (video)
Finnish Stitch 3+3 "drop & pick" (Börstil III) (video)
Finnish Stitch 3+3 F3 (Säkkijärvi) (video)
Finnish Stitch 4+1
Finnish Stitch 4+2 (Kannas) (video)
Finnish Stitch 4+3
Finnish Stitch 4+4 (Sääminki; Karjala) (video)
Finnish Stitch 5+2 (Pyhäjoki 2) (video)
RUSSIAN STITCH GROUP
Same stitch, three ways to manipulate the loops
Russian Stitch 1+1+1 (A) (Dalby Stitch) (video)
Russian Stitch 1+1+1 (B) (Dalby Stitch) (video)
Russian Stitch 1+1+1 (C) (Dalby Stitch) (video)
Russian Stitch 1+1+1, plaited edge (Telemark) (video)
Russian Stitch 1+1+2 (Oulu) (video)
Russian Stitch 1+1+2, plaited edge, F1 (Vehmasjärvi) (video)
Russian Stitch 1+1+3 (video)
Russian Stitch 1+2+1 (Kitee) (video)
Russian Stitch 1+2+2, without thumb loop (flat) (Polvijärvi) (video)
Russian Stitch 1+4+1 (Sulkava) (video)
Russian Stitch 2+1+1 (Sonkajärvi 2) (video)
Russian Stitch 2+1+2 (Metsäpirtti 3) (video)
Russian Stitch 2+2+1 (Sakkola) (video)
Russian Stitch 2+2+1, F1B1 (Metsäpirtti 4)
Russian Stitch 2+2+2 (see below)
Russian Stitch 2+2+2, plaited edge (Parikkala) (video)
Russian Stitch 2+2+3 (Salmi) (video)
Russian Stitch 2+3+3 (Joutseno) (video)
Russian Stitch 2+4+1 (Metsäpirtti 2A) (video)
Russian Stitch 3+2+2 (video)
Russian Stitch 3+2+2/2+2+2+2, variant (Sonkajärvi) (video)
Russian Stitch 3+3+3 (Riistavesi) (video)
Just for comparison - 7 ways to do the same stitch
Russian Stitch 2+2+2 (video)
Same stitch, four ways to manipulate the loops
Russian Stitch 2+2+2 (A) (video)
Russian Stitch 2+2+2 (B) (video)
Russian Stitch 2+2+2, butterfly technique (Joutseno) (video)
Russian Stitch 2+2+2 (Aili Kuronen's way) (Rautjärvi) (video)
Russian Stitch variant, 2+2+1/3+3 B1 (Kizhi)
TURNING STITCH GROUP
Turning Stitch
(turn the last loop, needle tip to right -->)
1+TR (video)
1+1+TR (video)
1+2+TR (video)
1+3+TR (video)
2+2+TR (video)
2+2+TR, plaited edge, F2 (Parikkala style) (video)
2+2+TR, plaited edge, F1 (Kaukonen's article) (video)
2+2+TR, plaited edge, M1 (Variant L) (video)
2+4+TR (Metsapirtti 2B) (video)
Turning Stitch, variant 2
(in the middle of the stitch, one loop "in Russian", needle tip to left <--)
1+TL+1 (Arboga) (video)
1+TL+2 (no name) (video)
1+TL+3 (Näshulta) (video)
2+TL+2 (Joutseno) (video)
2+TL+2 F2 (Mr Antti Veikko Kekki) (video)
2+TL+3 (Karbenning) (video)
Turning Stitch, variant 2b
(in the middle of the stitch, turn one loop, needle tip to right --> )
1+TR+1 (video)
1+TR+2 (video)
1+TR+3 (video)
2+TR+2 (Joutseno) (video)
Turning Stitch, variant 3
(the first stitch "in Russian", needle tip to left <--)
1TL+1, "first of two loops is turned" (video)
OTHER NALBINDING STITCHES
Cross-knit looping (Coptic Stitch / Tarim Stitch) (video)
Cross-Dalby (by Petra Ommen) (video)
Dalarna Stitch (video)
Danish Stitch (Börstil II) (video)
Double Danish (OO/UUO) (video)
Double Curl (by Petra Ommen) (video)
Helle's Stitch
Omani Stitch (video)
Saltdal Stitch (video)
Vad (video)
Variant 5 (video)
Variant 7 (video)
Variant 9 (video)
Varsta (video)
Vendel Stitch (Fullbrotekniken) (video)
York Stitch (Coppergate Stitch, Jorvik Stitch) (video)
Åland (video)
Åsle Stitch (Åsle stygn) (video)
Åsle Stitch variant, a thicker one (video)
Åsle Stitch, round start, increasing, decreasing (video)
Åsle variant F2 (video)
Åsle Weaver M1 (video)
Nalbinding Mittens - Step-by-Step
- longer videos, voiceover both in English and Finnish
1 (video) - How to make mittens cuff up, Part 1/2. First loops, joining a chain of stitches (foundation row) to a circle.
2 (video) - How to make mittens cuff up, Part 2/2. How to connect the new stitches to the previous row (F1, F2, etc), different ways. Making thumb opening. Decreasing at the mitten top, round and square tops (when you are making mittens cuff up).
3 (video) - How to make thumb. Beginning, corners, finishing.
4 (video) - The placement of the thumb in a square top mitten.
Note, if your mitten has quite a few more loops on the bottom half (thumb-wrist) than in the upper half (thumb-top), the twisting shown on the video won't happen. On the other hand, if you wish your mitten width to be equal, have a look at the twisting shown on the video.
5 (video) - Increasing and Decreasing.
6 (video) - How to make mittens top down. Square top. Pivoting, increasing.
7 (video) - How to finish off the edge. In addition, if your mittens were made cuff up, how to undo the point where the mittes were started, and then finish off. The unwanted gaps at the root of the thumb.
Note, some of the 'darning' stitches can be done on the reverse side, so that the gaps will get closed, but the additional darning stitches won't be too visible on the right side.
8 (video) - How to make mittes top down. Round start. Increasing.
9 (video) - How to adjust gauge, size of stitches.
Sometimes it may be necessary to adjust your gauge to fit the yarn and the stitch type, in order to get the finished item look like the way you want it.
10 (video) - Different ways to handle the thumb loops.
Ms Aili Kuronen nalbinding
- autumn/fall 2010
Finnish Stitch 2+2, Part 1/3 (link) - first row
Finnish Stitch 2+2, Part 2/3 (link) - pivot
Finnish Stitch 2+2, Part 3/3 (link) - Aili's way of working
Russian Stitch 2+2+2, Part 1/4 (link) - first loops
Russian Stitch 2+2+2, Part 2/4 (link) - first row
Russian Stitch 2+2+2, Part 3/4 (link) - pivot
Russian Stitch 2+2+2, Part 4/4 (link) - Aili's way of working
Spotted mittens, Finnish Stitch 2+2, Part 1/2, short video, change of colour (link)
Spotted mittens, Finnish Stitch 2+2, Part 2/2, longer video (link)
Note, you can use the same technique of making spots also for making vertical stripes.
Splicing by plaiting/braiding (link)
Splicing by ply-splitting (link)